Adding a Bill
Adding a bill is simple and can be done manually a few different ways, or sync'd automatically from your accounting system.
This article focuses on how to add bills manually.
1) Make sure beneficiary has been added to your Vendor's List
Before starting, make sure you have added the beneficiary to your ‘Vendors’ list. If you have not completed this step yet, you can refer to our step-by-step instructions on how to add a local vendor or international vendor.
2) Add the bill
When you are ready to add a bill, you can start by selecting the vendor first or by creating a new bill and adding the vendor later.
Option 1: Find Vendor First
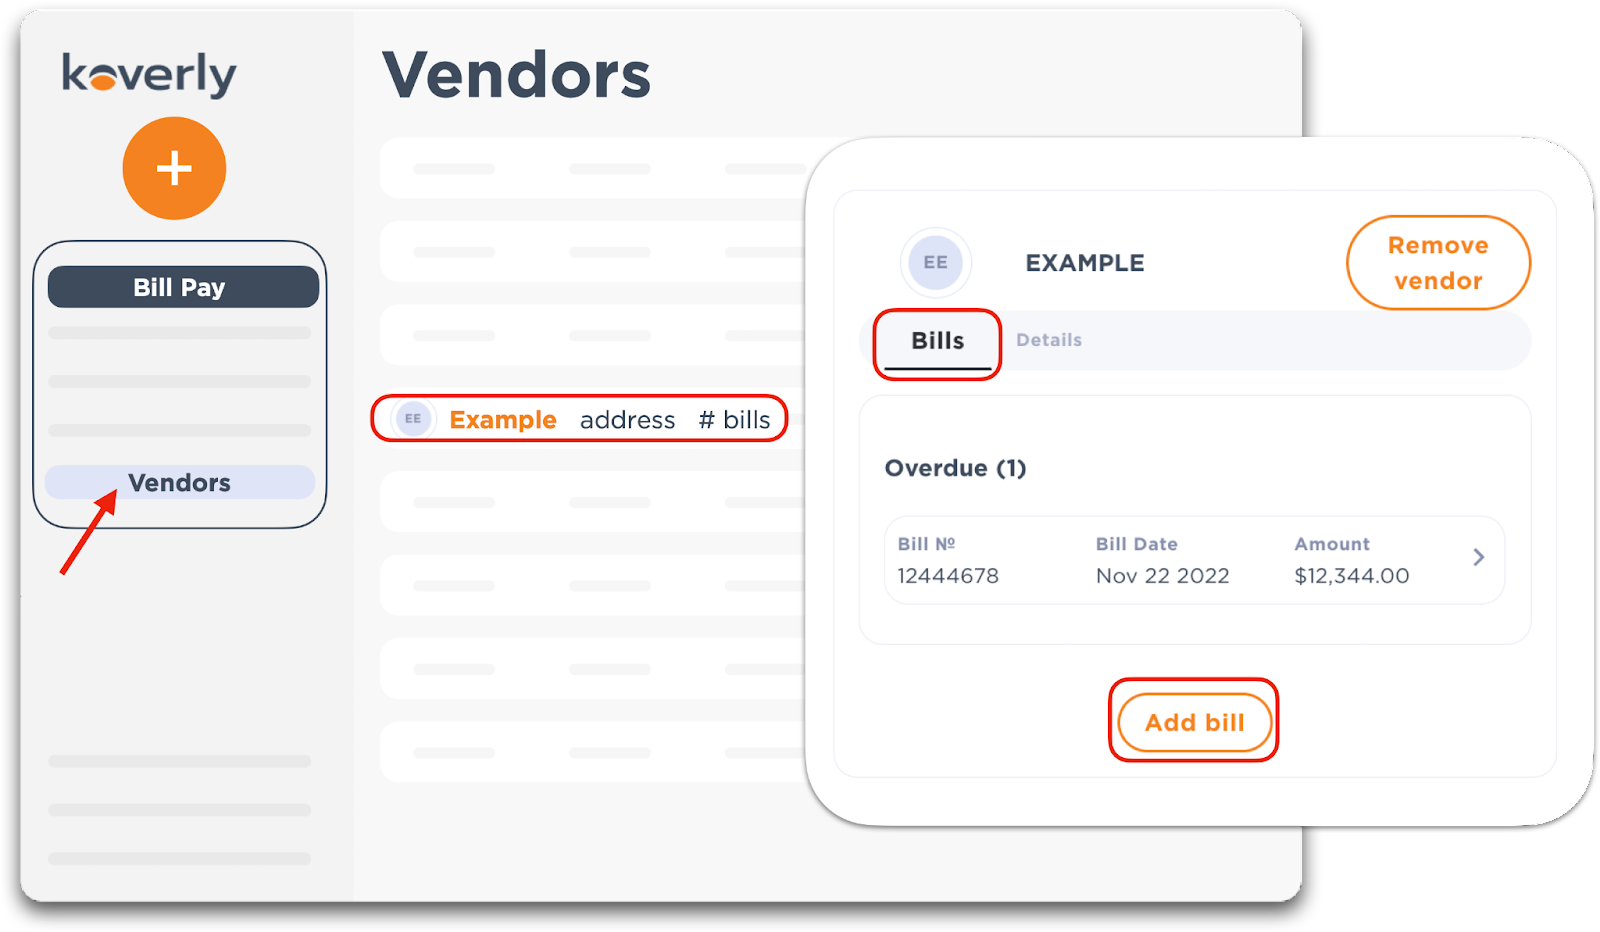
Go to the “Bill Pay” section and open the “Vendors” tab. Find the beneficiary you want to pay and click on their name card. This will open the ‘Bills’ menu in the right-hand panel. Press the ‘Add bill’ button at the bottom of the panel. Continue to ‘Bill details’ (Step 2 below).

Option 2: Create bill first
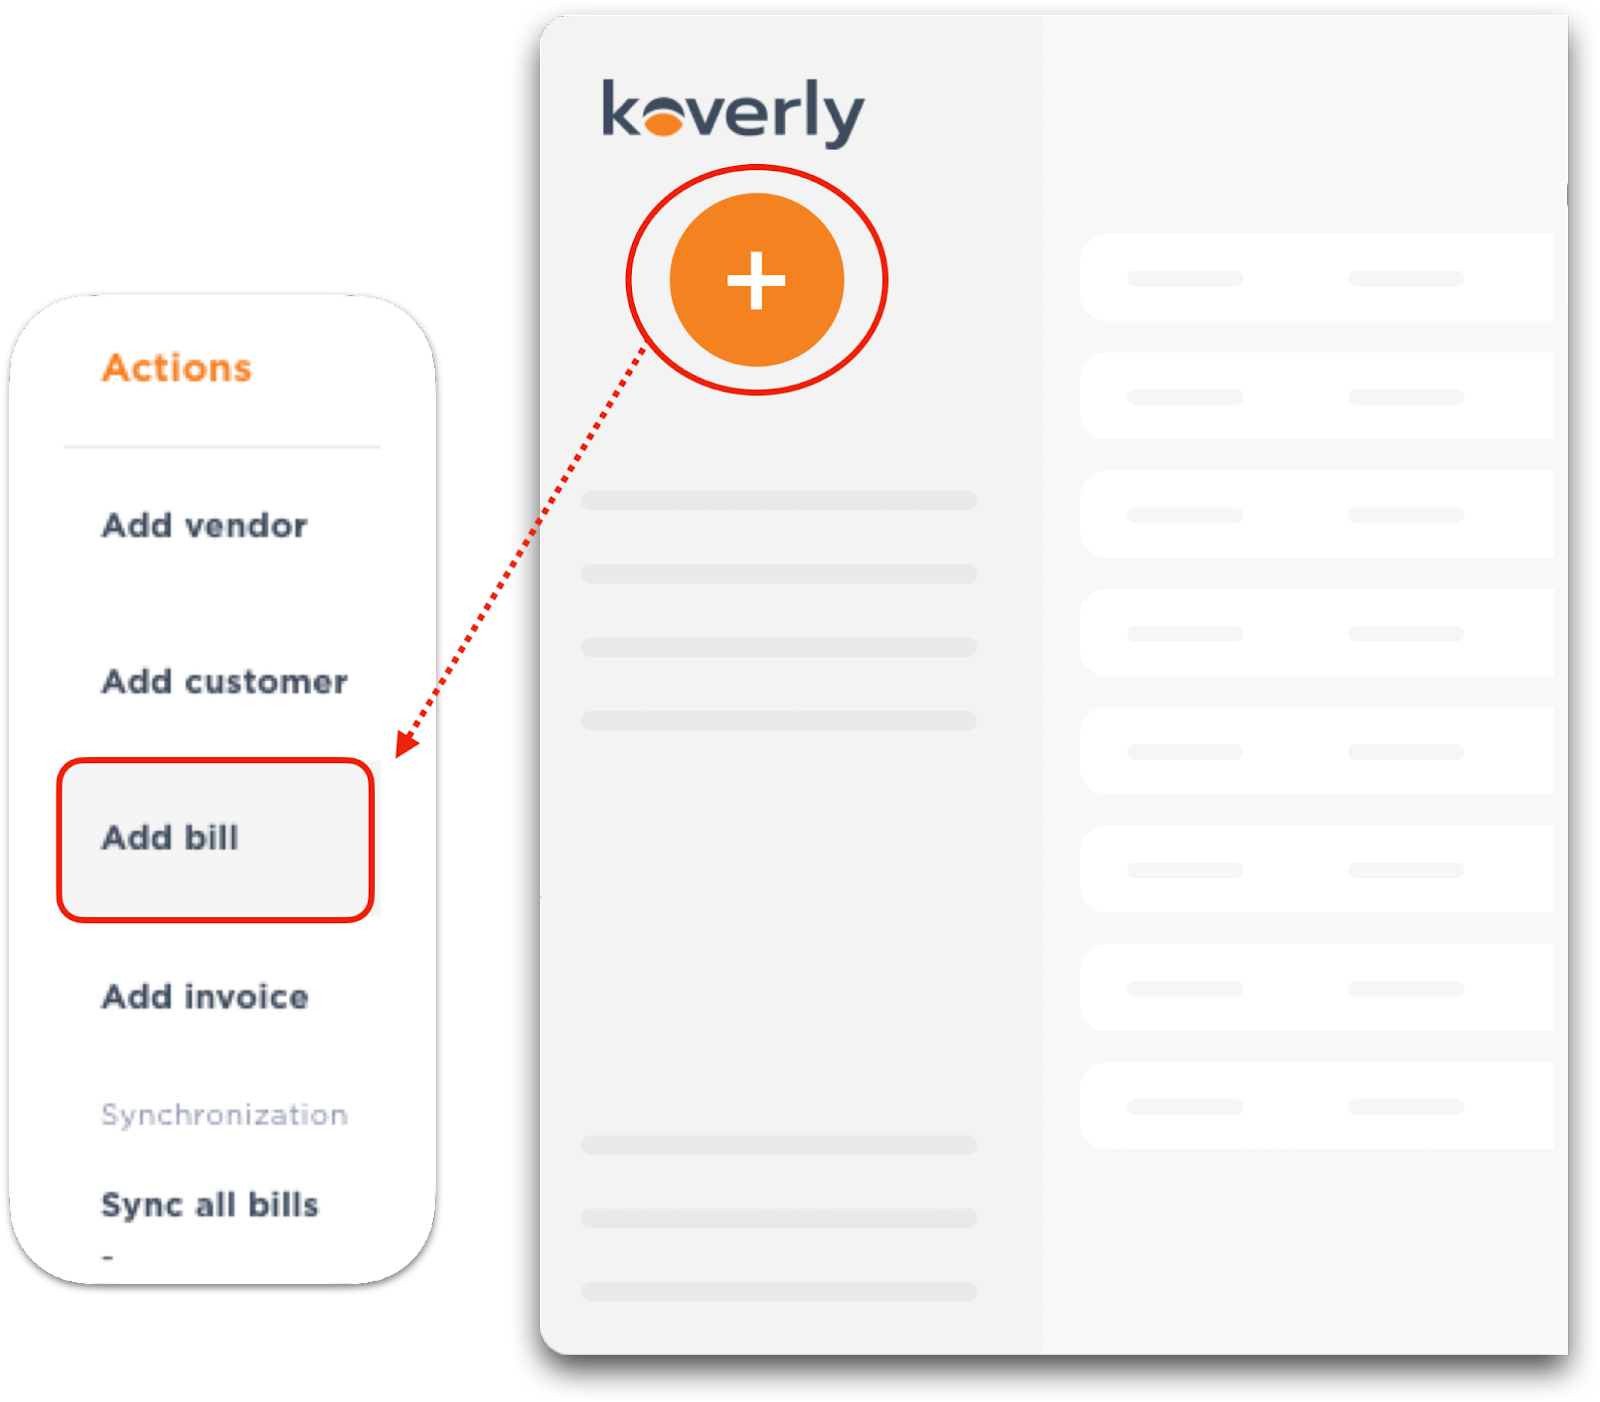
Go to the 'Bills' tab under the ‘Bill Pay’ section. Click the ‘Add bill’ button in the top right-hand corner, or click on the orange '+' symbol and select 'Add bill' from the drop-down.
Continue to ‘Bill details’ (Step 3 below).


3) Provide Bill Details:
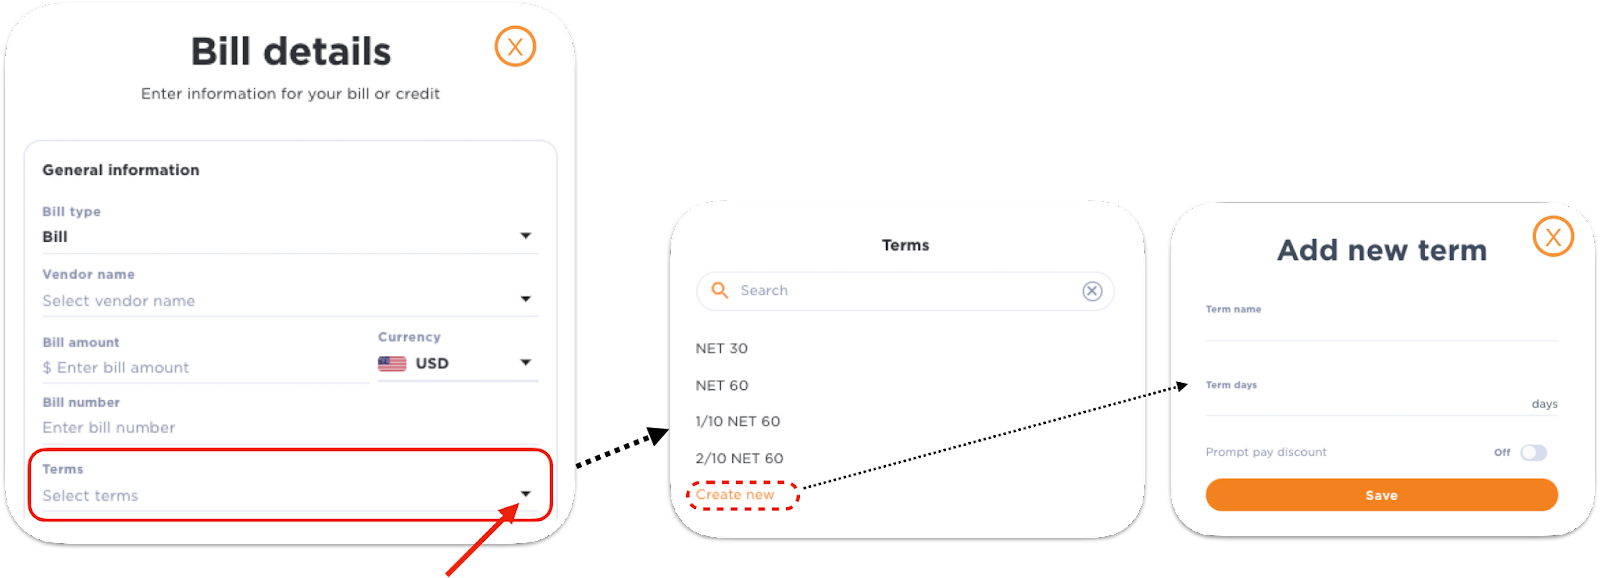
Here is an explanation of the fields you will need to complete to provide Bill details:
- Bill type: Select 'Bill' or 'Credit' from the drop-down menu
- Vendor Name: Make sure to select the right vendor
- Bill Amount/Currency: Enter the correct bill amount in the right currency
- Bill Number: Enter the bill number from the invoice (if you do not have the invoice number you can enter the date)
- Terms (optional): Choose your net terms from the dropdown list or create new terms (how much time you have to pay your bill from the bill date)
- Bill Date: Add the date of the bill found on the invoice
- Due Date: this will automatically populate based on the net terms that were selected
- Notes (optional): Add any relevant notes to this bill if you would like
- G/L account: Only applies if you connect your accounting system
- Upload Bill (optional): Drag a PDF file into the box or click on the box to find the invoice on your computer to upload.
*If at any point you need to exit click the orange ‘x’ in the top right-hand corner.

4) Review and Save:
Once all the information has been entered click save. You will see this bill in your 'Bill pay' dashboard. For more information on how to make payments click the links below:
.png)
with Koverly


.svg)
.svg)
.svg)
.svg)
.svg)
.svg)
.svg)
.svg)
